Redesign

If you've been following me here on Mother's Recipe Mementos, I've decided to keep all my content on my main site, http://www.mothersmementos.com/.  If you'd like to stay in touch (and I hope you will), please follow Mother's Mementos on Twitter/Facebook or subscribe via email.

Warmest regards and Happy Valentine's Day,
Rachel

Sweet Potato, Pear, and Carrot Soup

{ when there's snow, there's soup. }
Another snowstorm.  Another cold winter's day.  Another perfect day for soup.  I had 3 large sweet potatoes on hand.  But I wanted to find something that would complement it.  So I looked in the fridge and found this glistening Bosc pear.


Perfect.

And then I also saw some carrots which I decided would be a good addition to the soup as well (forgot to take a picture though).  

I adapted a recipe from Taste of Home and it was fabulous.  I will definitely be making this again - snowstorm or not.  But quite truthfully, I'm hoping to never see another snowflake again this winter unless it's a garnish on a soup.  :)

Sweet Potato, Pear, and Carrot Soup
{ Makes: 6 servings; Prep time: 15 minutes; Cook time: 30 minutes }
Adapted from Taste of Home

Ingredients:
3 large sweet potatoes, peeled and cubed
2 large carrots, peeled and sliced
3 cups chicken broth, divided
1 teaspoon salt, divided
1/4 teaspoon ground cinnamon
1/4 teaspoon ground nutmeg
2 large pears, peeled and sliced
1 large onion, chopped
1 tablespoon butter
1/2 cup heavy cream
1/4 teaspoon black pepper

Directions
  1. In a large saucepan or pot, combine the sweet potatoes, carrots, 2 cups of chicken broth, 1/2 teaspoon salt, cinnamon, and nutmeg.  Bring to a boil.  Reduce heat; simmer, uncovered, for 15-20 minutes or until tender.
  2. Meanwhile in another large saucepan, cook and stir the pears and onion in butter over medium heat for 5 minutes until onion is translucent.  Stir in 1 cup of chicken broth.  Reduce heat; simmer, uncovered, for 5 minutes.  Stir into the sweet potato mixture.  Cool slightly. 
  3. In a blender, cover and puree soup in batches; return all to the pot.  Stir in the cream, pepper and remaining salt; heat through (do not boil).   Garnish with slices of pear.  

Korean Vegetable Pancakes

{ crispy, savory vegetable pancakes }
Korean pancakes (pa-jeon) are a popular appetizer or side dish in Korean culture.  It's hearty and filling enough to be a meal in itself.  Pa-jeon is absolutely amazing when eaten piping hot straight off the stove.  So wonderfully savory and delicious.   It's usually served with a dipping sauce consisting of soy sauce, vinegar, and sugar.  You can find many variations of the pancake - most common are scallion, kimchi, or seafood.   Seafood pancake (called hae-mul pa-jeon) is my absolute favorite; it consists of squid, clams, shrimp, and scallions.

I wanted to make some pa-jeon for the boys for lunch, but I didn't have any seafood on hand.  So I decided to make vegetable pancakes instead.  If you have some fresh veggies, flour, water, and egg around, this is a simple meal to make. 

I have screwed these up horribly many times before and have learned from my mistakes.  So here are a few tips:
  1. Don't make the pancakes too thick.  Otherwise, they're bound to be soggy.
  2. Don't be stingy with the oil.  In the past, I tried using as little oil as possible to keep them from being greasy and it would be a flop (literally).  You don't want to go overboard with the oil, either; these are not meant to be deep-fried.  Just be sure to use enough to coat the bottom of the pan.
  3. If they do turn out soggy or floppy, don't despair.  They're salvageable!  Just add some more oil to the pan and fry it again.  Sometimes they turn out better this way!

{ vegetables sliced thin and ready to go in the batter }
 
{ mix, mix, mix }

{ fry in the pan }

{ and voila! }
 
So how good are they?  I think this says it all. 


Korean Vegetable Pancakes
{ Makes about four 8-inch pancakes }

Ingredients:
2 cups all-purpose flour
2 cups ice cold water
1 egg, beaten
1 teaspoon salt
Vegetable oil for pan frying (approximately 1 1/2 tablespoons for each pancake)
2 medium potatoes, peeled and julienned
1 carrot, peeled and julienned (or grated)
1 green pepper, cut into thin slices
1 red pepper, cut into thin slices
1 bunch of scallions, sliced

Directions:
  1. In a medium bowl, mix flour, egg, salt, and 1 1/2 cups water until a smooth batter is formed.  If batter is still thick, add a little more water (you want it to be the consistency of pancake batter).  Stir in the potatoes, carrots, peppers, and scallions.
  2. Place an 8-inch nonstick skillet over medium-high heat.  Let it heat for 15-20 seconds, and then coat bottom with vegetable oil.  Ladle in about a quarter of the batter and spread it out evenly into a circle.  Cook for 5 minutes until edges start browning.  Then flip and cook for another 3-5 minutes.  When completed, transfer the pancake on a plate lined with a paper towel to drain oil (if necessary) and then place on serving plate.
  3. Repeat steps 1 to 3 with remaining batter.
  4. When pancakes are all finished, cut into triangles and serve with dipping sauce.  
Dipping sauce (I use this sauce for pajeon and dumplings):

Ingredients:
2 tablespoons soy sauce
1 1/2 tablespoon water
2 teaspoons sugar
1/4 teaspoon rice or white vinegar
1/4 teaspoon sesame oil
Pinch of roasted sesame seeds
Pinch of chopped scallion
Pinch of crushed red pepper (optional)

In a small bowl, mix together soy sauce, water, vinegar, sugar, and sesame oil.  Sprinkle in sesame seeds, chopped scallion, and if desired, pinch of red pepper.

Toffee Coffee Dark Chocolate Brownies


My hubby loves coffee.  He drinks it like it's water.  He also loves dark chocolate.  So he went ga-ga over these brownies.  He did prefer it without the frosting, but I liked it with and since I was doing the baking, guess who won?  :)

Toffee Coffee Dark Chocolate Brownies
Adapted from Better Homes & Gardens
{ Makes: 20 brownies; Prep: 25 min.; Bake: 35 min. }

Ingredients
1 19.8- or 21-ounce package dark chocolate brownie mix
1/2 cup toffee pieces
2 tablespoons instant espresso powder or instant coffee crystals
2/3 cup walnuts, chopped (optional)

Directions:
  1. Preheat oven to 350 degrees F. Grease a 9-inch square baking pan and set aside.
  2. Prepare brownie mix according to package directions, except stir the 1/2 cup toffee pieces, the espresso powder, and chopped walnuts into batter. Spread batter into prepared pan.
  3. Bake in preheated oven for 35 minutes.  In the meantime, prepare frosting (see instructions below). 
  4. Once brownies are done baking, cool in pan on a wire rack.  Remove baked mixture from pan.  Spread frosting onto cooled brownies and sprinkle with chopped walnuts.  Cut into bars.  Makes 20 brownies.
TO STORE:  Place bars in a single layer in an airtight container; cover.  Store in the refrigerator for up to 3 days.

For Frosting:
1  cup  (1/2 lb.) unsalted butter, at room temperature
4  cups  (1 lb.) powdered sugar, sifted
1/8  teaspoon  salt
2  tablespoons  milk
2  teaspoons  vanilla

Preparation:
In a bowl, with a mixer (preferably fitted with whisk attachment) on low speed, beat butter, 2 cups powdered sugar, and the salt until blended.  Add milk and vanilla; beat until blended. Add remaining powdered sugar, 1 cup at a time, beating until incorporated.  Turn mixer to high speed and beat frosting until fluffy and smooth.

Kimchi Bulgogi Pizza

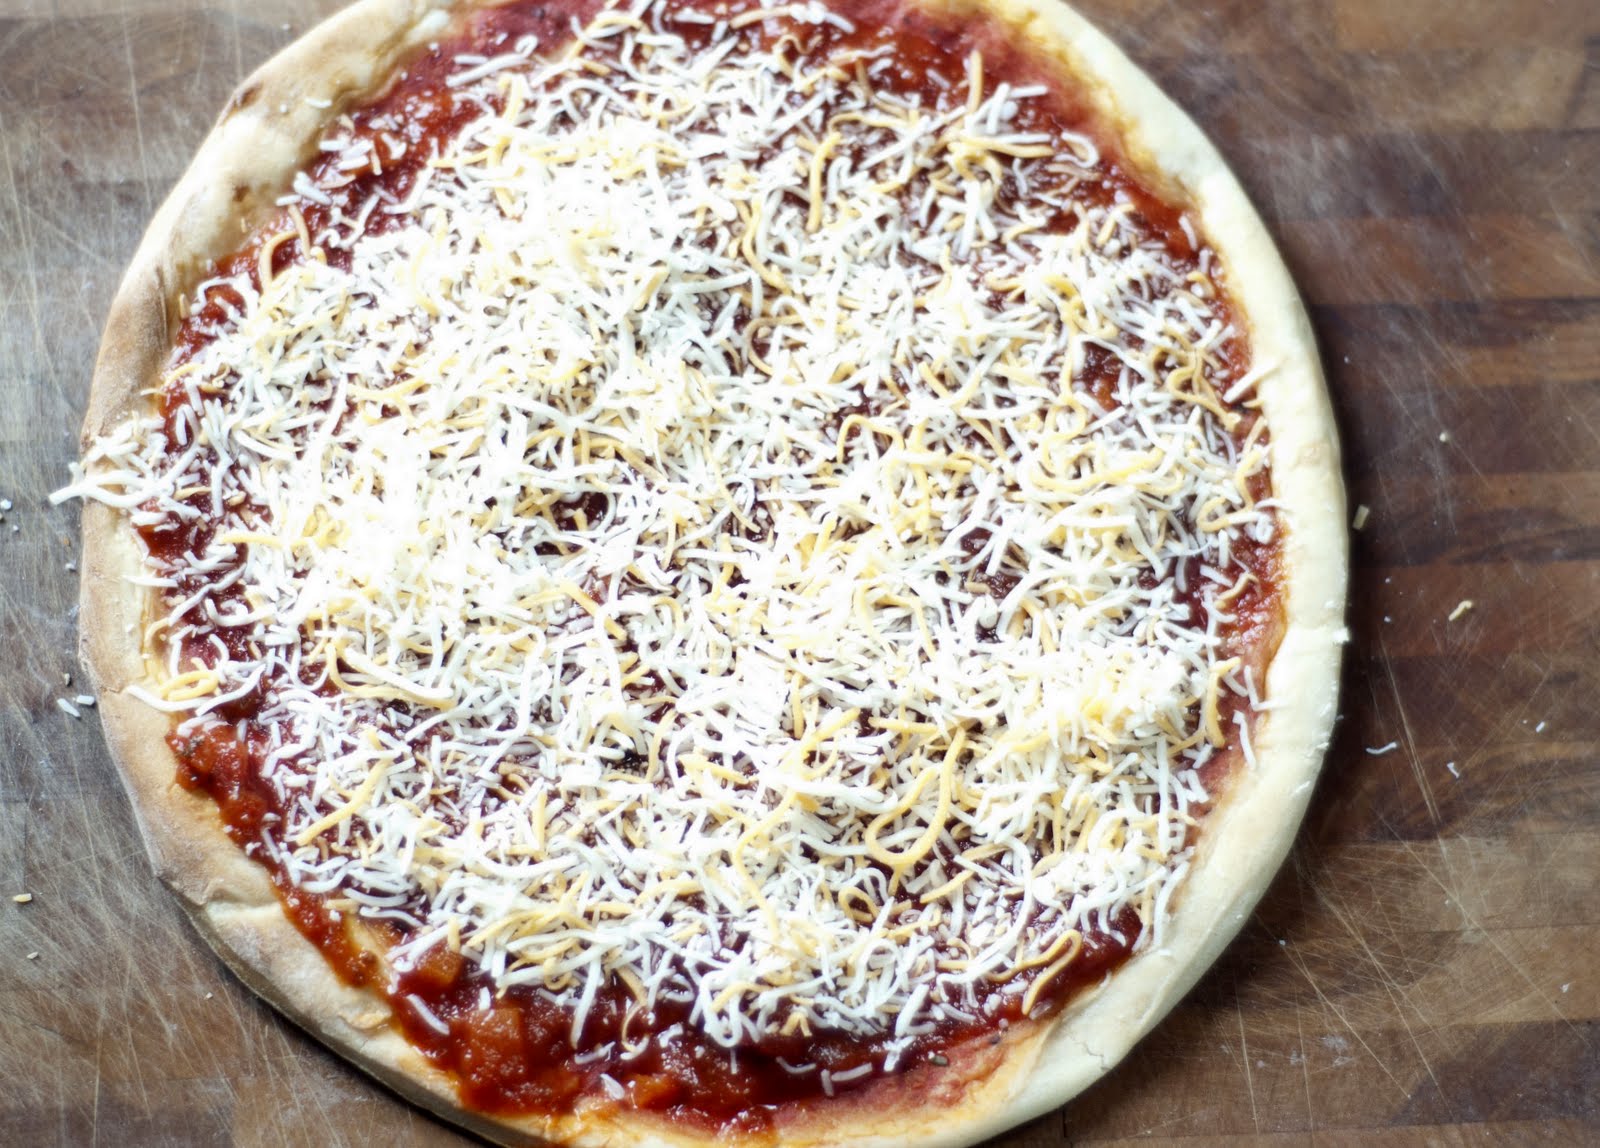
{ you'll never guess the secret ingredient in this pizza.  okay, you got me.  the title gives it away. }
You know those crazy Koreans who eat kimchi with everything?  Thanksgiving dinner, meatballs, Subway sandwiches, chicken noodle soup, pizza.  Yes, pizza. 

Just in case you don't know what kimchi is, it's fermented seasoned cabbage that's a staple in a Korean's diet.  It's usually served as a side dish ("bahn-chan") with the main meal.  Bulgogi is a deliciously marinated beef usually prepared with soy sauce, garlic, sesame oil, and sugar.  You can buy kimchi and bulgogi at most Asian markets.

I remember when someone first told me about kimchi bulgogi pizza back in college and raved about how good it was.  I thought she was completely nuts!  But when I finally tried it, I realized she was so right.

When I told my husband and sister-in-law I was making this for lunch this past Saturday, they gave me that "you're crazy" look, too.  I'm happy to say I've now converted them into believers.

I feel silly writing up a recipe for this when it's so basic.   So I'm just going to provide a pictorial on how this is assembled.

First, gather the ingredients:
Prepared pizza crust
Marinara sauce
Shredded mozzarella cheese
Spinach, lightly sauteed
Kimchi, cut and fried with vegetable oil
Bulgogi, sliced and fried with vegetable oil

    Then, start assembling:

    Add marinara sauce on top of the pizza crust.
    Pile on the mozarella cheese.

    Sprinkle with lightly sauteed spinach.

    Add fried kimchi.

    Add fried bulgogi.
     
    Bake pizza in oven set to 375 degree F for about 10-15 minutes
    until cheese is melted and crust is ready.

    When done, sprinkle more sauteed spinach on top.

    Finally, slice and serve:

    And await for happy smiles.

    Okay, so I didn't really give my son kimchi pizza because it's a bit spicy.  I made another pizza with marinara sauce, cheese, white beans, spinach and olives for the kids.  They loved it.  But I look forward to the day when I can share this delightful Korean twist to an Italian dish with my sons.

    There are so many variations you can make to this, so be adventurous!

    Cream Puffs with Custard & Fruit Filling

    { this might very well put beard papa's out of business. }
    I wish someone had told me before how easy it is to make cream puffs.  It would have saved me a lot of money and trips to Fort Lee and the Upper West Side for Beard Papa's.  I feel it's my civic duty to pass on the knowledge and share with you how simple these scrumptious desserts are to make.  I may be putting Beard Papa's out of business by doing so.  Sorry 'bout that. 

    [If you want to skip all the verbiage and just get to the recipe, scroll down to the bottom of this post.]

    We had friends over for dessert on Saturday and then our neighbor over on Sunday to watch the football game (go Jets!).  I wasn't sure what to make for dessert for the evenings so I sat skimming through my Taste of Home cookbook when my eyes came across a cream puff recipe.  Glancing at the ingredients and the directions, I thought, "There's no way it can be that simple."

    Well, folks.  I'm here to tell you that it is.

    I did a research online for cream puff recipes just to be sure the one in Taste of Home wasn't steering me wrong.  I saw a few and they seemed relatively similar but had different suggestions for the filling. 

    In reading the reviews for a cream puff recipe on Allrecipes.com, I got a little concerned and thought maybe this isn't as simple as it seems.  A few of the reviews complained about the dough appearing too runny after adding the 4 eggs (some suggest beating in the first 3 and then adding the 4th if the texture isn't right).  I have no idea what the right texture is supposed to be like, but I went ahead and added the 4th egg and it turned out beautifully.

    { the dough is ready to go in the oven }
    Another common comment I read was that the pastry didn't puff and it turned out flat.  A few reviewers claimed you had to poke a hole while the pastry was baking to make sure it would puff.  Being paranoid, I took the precaution of taking this step.  So 20 minutes into the baking process, I took a chopstick and popped a hole in 10 out of the 12 puffs.  I wanted to see what would happen to the couple that didn't get "popped".

    { this puff didn't get "popped" and rose to the occasion }
    Well, they turned out just as beautiful as the rest.  So I'm not sure this extra step needs to be taken, but I guess it couldn't hurt.  But it is important to make sure it's cooked through to the center, otherwise it will get soggy and sag.  And other reviewers said it's helpful to let it sit in the oven with the door ajar for a minute or so after they're done baking to prevent collapsing.  I didn't do this either.  I just transfered them immediately to a wire rack, and it turned out just fine.

    They all turned out quite beautifully.

    { perfect puffs }
    And when you open them up, they're just begging to be filled with some sweet custard and fruit goodness. 
    { "fill me!" }
    Oh yeah, like that.


    It was nice knowing you Beard Papa's.

    Cream Puffs with Custard and Fruit Filling
    { Prep time: 30 minutes; Bake time: 30 minutes; Yields: 12 puffs }

    Ingredients
    For pastry puff:
    1/3 cup butter, cubed
    1 cup water
    1 tablespoon granulated sugar
    1/8 teaspoon salt
    1 cup all-purpose flour
    4 eggs
    1 teaspoon vanilla extract

    For filling:
    1 (5.1 ounce) package instant vanilla pudding mix
    2 cups heavy cream
    1 cup whole milk
    1 cup frozen whipped topping, thawed
    1 cup strawberries, sliced

    Directions

    1. Mix together vanilla instant pudding mix, cream and milk.  Cover and refrigerate to set.
    2. Preheat oven to 400 degrees F.  Line baking sheet with parchment paper; set aside.
    3. In a small pot, bring water, butter, sugar, and salt to a boil over medium heat.  Once boiling, add flour all at once and with a wooden spoon, stir until a smooth ball forms.  Remove from heat and let stand for 10 minutes.  Transfer dough to a stand mixer.  Beat in eggs one at a time, mixing well after each until dough is smooth and shiny.  Mix in the vanilla.  Drop by 2 rounded tablespoonfuls 3 inches apart onto baking sheet.
    4. Place sheet on middle rack in the oven and bake for 30 minutes or until golden brown.  Centers should be dry (check with toothpick).  Transfer to wire rack to cool.
    5. While shells are cooling, remove pudding mix from the fridge.  Fold in 1 cup of whipped topping and mix.  When the shells are cool, split and fill with custard and then layer on sliced strawberries.  Replace cream puff tops and dust with confectioners sugar.  You can refrigerate until ready to serve.*
    *Tip:  It's best to keep the pastry and custard separate until ready to serve to prevent the cream puff from getting soggy. 
    Next time, I'm going to try this with chocolate and banana pudding mix. 

    Enjoy!

    Potato Broccoli Cheddar Soup

    It snowed last night here in the northeast (again).  I personally would be happy not to see anymore snow this winter.  But the kids absolutely love it. 

    While the gang enjoyed the white blanket outside, I surveyed our fridge to figure out what to make for lunch.   I thought something hot and hearty was in order on a day like this.

    I found some broccoli, potatoes, onions, and cheese.

    { what's for lunch? }

    Hmm.  What to do with these?  And then it dawned on me: 

    { warm-you-right-to-the-bone potato broccoli soup }
    I found a great recipe for potato broccoli soup from Delish.com to work from and made some modifications.  What I really liked about this recipe is that it didn't let the broccoli stems go to waste!  All the other recipes I glanced at only used the broccoli florets.

    The slight changes I made to the recipe include frying the vegetables in olive oil first, adding whole milk (you can also use heavy cream), using cheddar cheese instead of parmesan (I actually only had Mexican blend on hand but would have preferred to use solely cheddar), and garnishing with bacon bits.  You can obviously tell I don't believe in skimping on the fat.  However, if you are watching your diet, the recipe as-is on Delish.com is probably a healthier option.

    When the family came in from the frigid cold, they were very delighted to see hot, homemade soup cooking on the stove.  Served with three-cheese seminola bread, it totally hit the spot and warmed them right to the bone.
    Potato Broccoli Cheddar Soup
    Adapted from Delish.com; Serves 4

    Ingredients

    1 1/2 tablespoons olive oil
    2 tablespoons butter
    1 onion, chopped
    1 3/4 pounds broccoli, thick stems diced (about 2 cups), tops cut into small florets (about 1 quart)
    5 medium-sized red potatoes, diced
    3 cups chicken broth
    1 cup whole milk
    1 teaspoon salt
    1/4 teaspoon fresh-ground black pepper
    1/2 cup shredded cheddar cheese
    2 pieces bacon, fried and diced (for garnish)

    Directions
    1. In a large pot, heat olive oil over medium-high heat.  Add butter, potatoes, onions, and broccoli stems.  Sautee for 5-10 minutes until onions turn golden brown.
    2. Add broth, milk, salt, and pepper.    Bring to a boil.  Reduce the heat and simmer until the vegetables are almost tender, about 10 minutes.
    3. In a food processor or blender, pulse the soup to a coarse puree.  Return the soup to the pot and bring to a simmer.   Add the broccoli florets and simmer until they are tender, about 5 minutes.   Stir 1/4 cup of shredded cheddar cheese into the soup, and serve the soup topped with the remaining cheese.  Sprinkle bacon bits on top.

    Hope you're all staying warm out there and getting to enjoy the snow a bit like these guys:


    Related Posts Plugin for WordPress, Blogger...